We had a very interesting situation come up in last nights game. It is a great example of turn sequence strategy. The starting situation looked something like this:
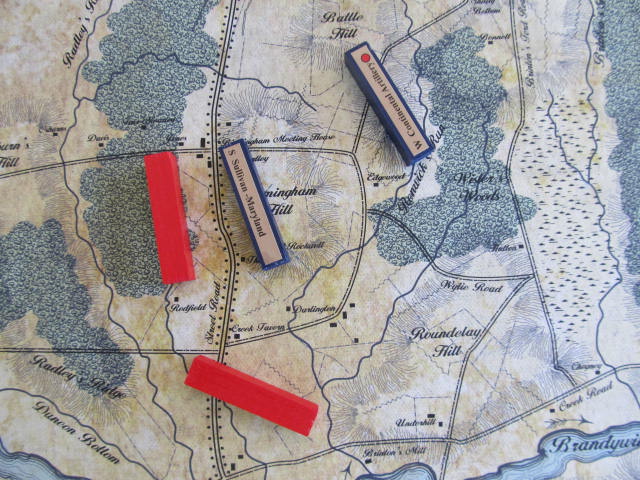
Washington got pulled to move first. Ok. We are on the last turn of the game. This is our last best position to hold to block the main road. (worth 3 VPs) I decide to move up the artillery to support Sullivan. If I do this, I can’t Rally them. No big deal. They are just supporting anyways right? So that is what I do:
 My left is threatened but Greene did have a Brigade on Roundelay Hill, so I thought I could cover that. Who get’s pulled next? Cornwallis!!
Greene rolls to jump ahead to cover my left flank.
He fails!!!
Washington was already spent. He already had to roll to move 1st to block a critical hole elsewhere. So he couldn’t roll for Greene again.
Ok. Not too big of a deal if I get hit in the flank. I am on a hill with artillery support. Once I Rally and turn Sullivan about, I’ll be fine….
Now I realize my peril. If Cornwallis really does move first, then it’s going to end up like this:
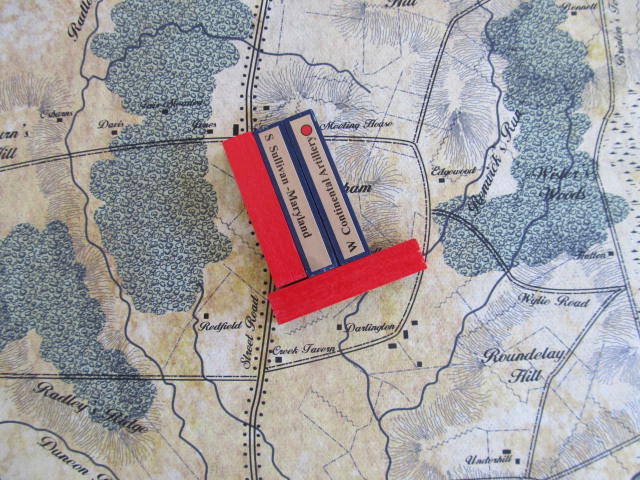
If that happens, Sullivan CAN’T Rally because he is already in contact with the enemy! Now I have 2 spent pieces being flanked. I’m likely to lose that fight. Even worse, if the lead piece (Sullivan) dies, the supporting artillery automatically dies with it! That means 2 extra points for the British plus another 3 for clearing the road!! That 5 point VP jump on the last turn will mean a British major victory.
Ok, no problem. Sullivan hasn’t moved yet. When he does, I’ll just run away. I won’t fight there. Normally this is an advantage. If you move last as a defender you can just pull back and withdrawal. Guess what? That trick won’t work here. The artillery already moved this turn remember? Sullivan can run away but the artillery can’t! The artillery will still be in contact with the British attacking it’s flank. -Because Greene failed to cover it. Lone artillery in contact with the enemy is automatically destroyed at the beginning of combat.
So I can’t run away. If I do, I’ll lose 4 VPs. 3 for the road and 1 for the artillery. I can’t stand and fight. If I do, I will most likely lose giving up 5 VPs. I have 1 chance to get out of all this mess:
Roll for Sullivan’s HQ.
He rolls.
Success!
This allows Sullivan’s Command to jump ahead of Cornwallis and move first. Before all of this…. unpleasantness occurs. Problem solved right? No.
Now Cornwallis rolls for his HQ.
Success!
I mean: Calamity!!! (for me anyways)
My bacon is back in the fire once more. There is no way out now. Washington is already spent. My worst nightmare becomes a reality.
Next up to move? Sullivan. A day late and a dollar short. I could be safe and abandon the artillery for a 4VP loss. Or I could risk a 5VP loss for the chance at actually holding this hill and running the British off for a draw. I decide to go for the draw. It is a long shot but after all of this, I’m due for a break right?
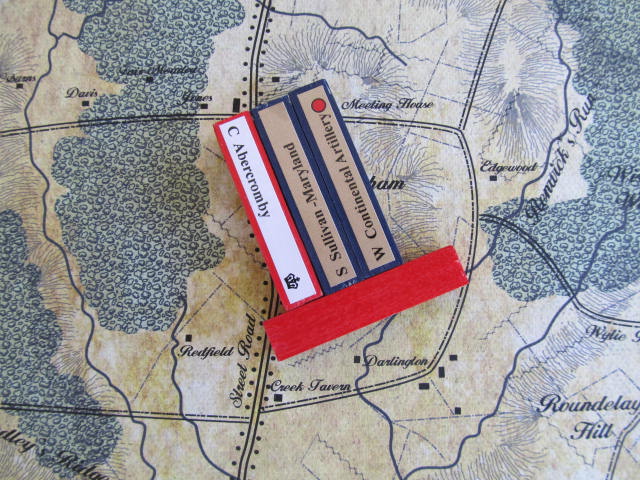
Sullivan can’t Rally. He can at least turn to face the attack so he isn’t getting hit from behind. With artillery support, I get to fire first! I need 2 hits. 1 to flip the British, a 2nd to send them running. Then all I have to do is deal with the flank attack. I roll. I do get 2 hits. Except it is Abercromby’s elite troops. Curses!!
Elites absorb the first hit. The 2nd hit flips them. Abercromby fires back. 2 hits will destroy everything. He gets 1.
Ok, so I catch a little bit of a break but not enough. Sullivan must retreat. I did save the artillery. They retreat with me. No lost VPs for pieces but we do lose the road now -3VPs.
A major British Victory.
Well, you can’t win them all. Considering the crazy twists of fate, I think I did pretty well over all. What do you think?
Leave a comment below!