Ever wonder what Kriegsspiel Dice looked like?

kriegsspiel

Most wargamers today know that the ‘first’ wargame was Kriegsspiel. It was created by Von Reisswitz as a training tool for the Prussian Army in 1812-ish.  Kriegsspiel is mostly known for its double blind, team play via Umpires.  True but have you ever wondered how they resolved combat?  Did they use CRTs?  No.  They used Kriegsspiel Dice!


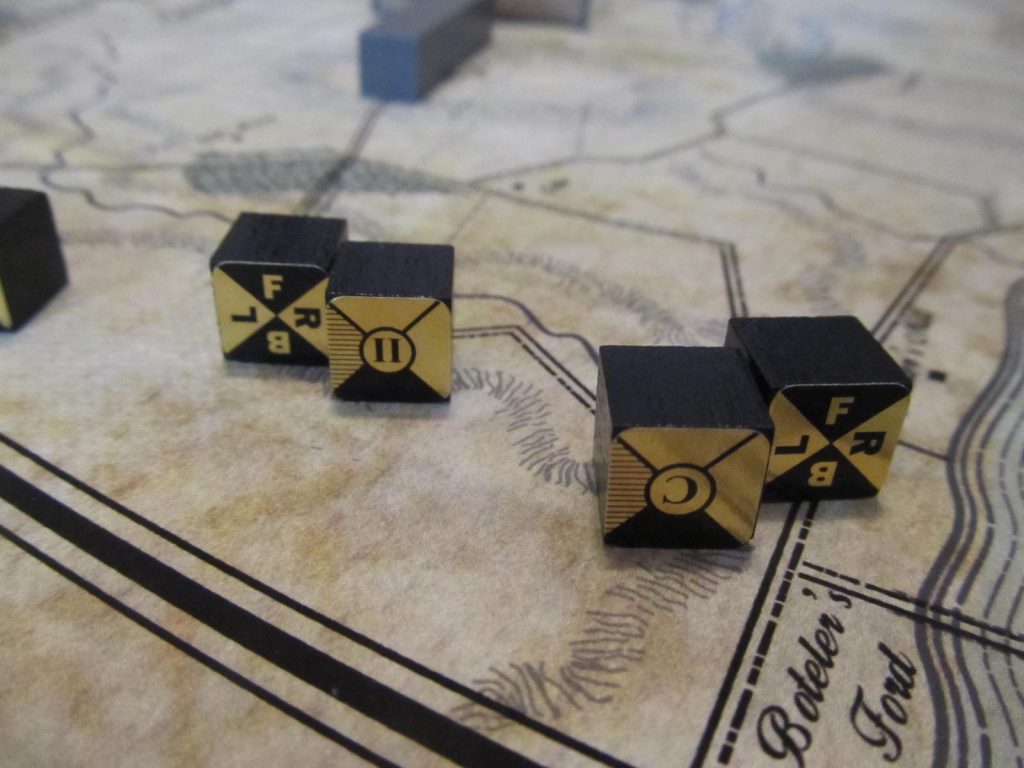
What?! How did that work?  What did they look like?  This is a fascinating piece of wargame history.  They looked like this:

kriegsspiel-dice


Fascinating  but how do you use them?  Essentially, the CRT is on the dice.  Here is a brief run down on the basics:

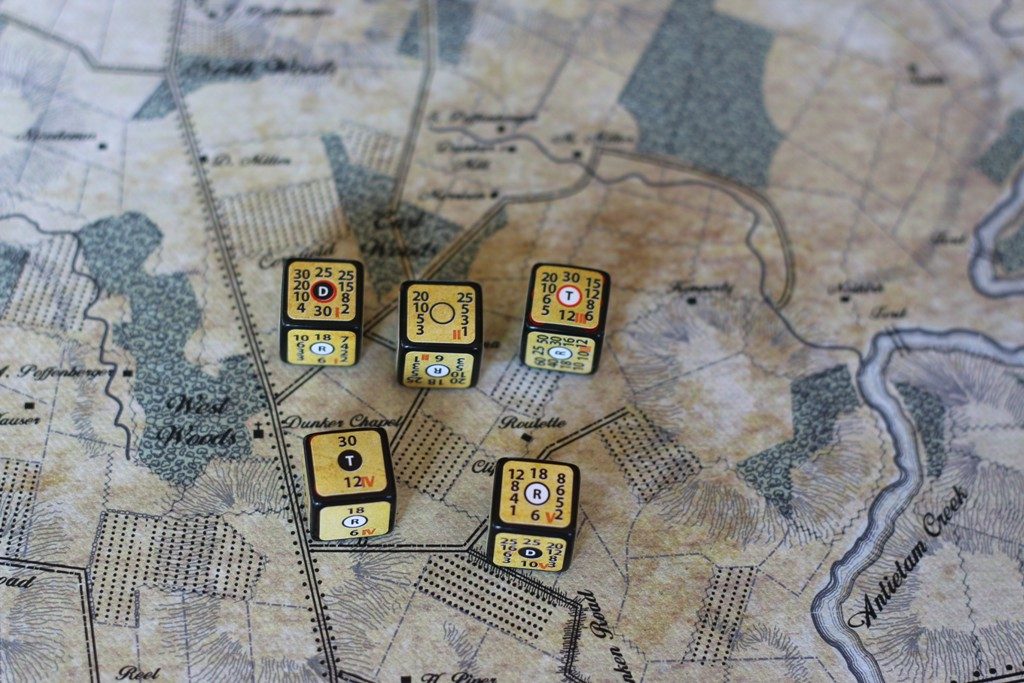
Each die represents a different combat Odds Ratio, ie. Die I is 1:1, Die II is 3:2, Die III is 2:1 etc. 

The left column of numbers are the casualties an infantry piece inflicts when firing.  They go from close range at the top to long range at the bottom.

The right column of numbers is the same except for skirmishers.

The center column is used for close combat / assaults.  The top number is losses for the attacker, the bottom for the defender.  The letter in the center of the circle denotes result to the unit for assaults:  R-repulsed, D-Defeated, T-Totally Defeated.  Black is a result on the defender.  White on the attacker. 

The big dots in the center are also used for artillery bombardments.  A red circle around the dot means the bombardment starts a fire if hitting buildings.  

Those are the basics.  It is a really detailed and technical combat system and it is based on the REAL combat experience of officers that served on the field in 1812.  You can debate theory, rates of fire and ranges all day long but this is what actually happened in the field with real men in battle.


So how do they play? We did an experiment to find out.  I was very apprehensive.  First I was concerned about all the little numbers.  How are you going to fit all of those on 1 die?  Is the die going to have to be super huge?  Even if you can, will it be too confusing?  How are you even going to be able to read all those tiny numbers and find the one you need?  Sounds like too much trouble.  I’ll just stick with the tables.  I’ve used those all my life.  What’s the big deal?  You just roll and look it up.  I expected that this would be a failed experiment.

Wow, was I wrong. We were completely surprised.  The numbers all easily fit on a standard size die.  With proper formatting and colors, they were easy to see and read.  The exact number you are looking for is easy to spot.  Once you know what the columns are for, it is easy to pick out the exact number for your range.  Your eye just snaps right to it automatically.  Far easier than I would have ever expected. 

The next thing we noticed was how much easier it made playing the game. This is hard to describe.  Here is an analogy:   Have you ever driven a stick shift in heavy, stop-n-go, rush hour traffic?  It wears on you.  Sure shifting is easy.  You can do it but when you keep having to shift up and down constantly for an hour straight, it wears you down.  Especially compared to driving an automatic. 

The Kriegsspiel Dice speed things up.  They free up my aging and feeble brain to focus on other things. It is pretty incredible when you think about it.  There is about 20 tables worth of data all packed onto those tiny, little dice.  No fuss, no muss.  It felt very liberating.


Looking back, I wonder why this old piece of technology was dropped. It is an amazingly powerful and efficient tool.  I wish all my modern games used dice like this. 


Own a Piece of History

From the Game That Started it All


You can get your own set of real Prussian Kriegsspiel Dice here.

You can still get the original Kriegsspiel game, along with a ton of amazingly detailed maps from:

Too Fat Lardies.

You can get scaled metal Kriegsspiel blocks here.

or

Wooden pieces with measuring apparatus here.

Historical Brandywine

One of the things so fun about Brandywine is all the different ways it can be played.  I don’t think I’ve ever seen 2 battles alike yet.  I also haven’t exhausted all the possible strategies yet either! 


Players are free to setup anyway / anywhere they want to.  The game doesn’t even provide for a historical setup.  Still it is kind of nice to know.  How exactly did the battle go down? 


So here you are.  Just for curiosities sake, this is how it opened up historically.  It is a nice reference for players wanting to study the actually historical fight.  


img_8311


img_8313


Written Orders

img_7221
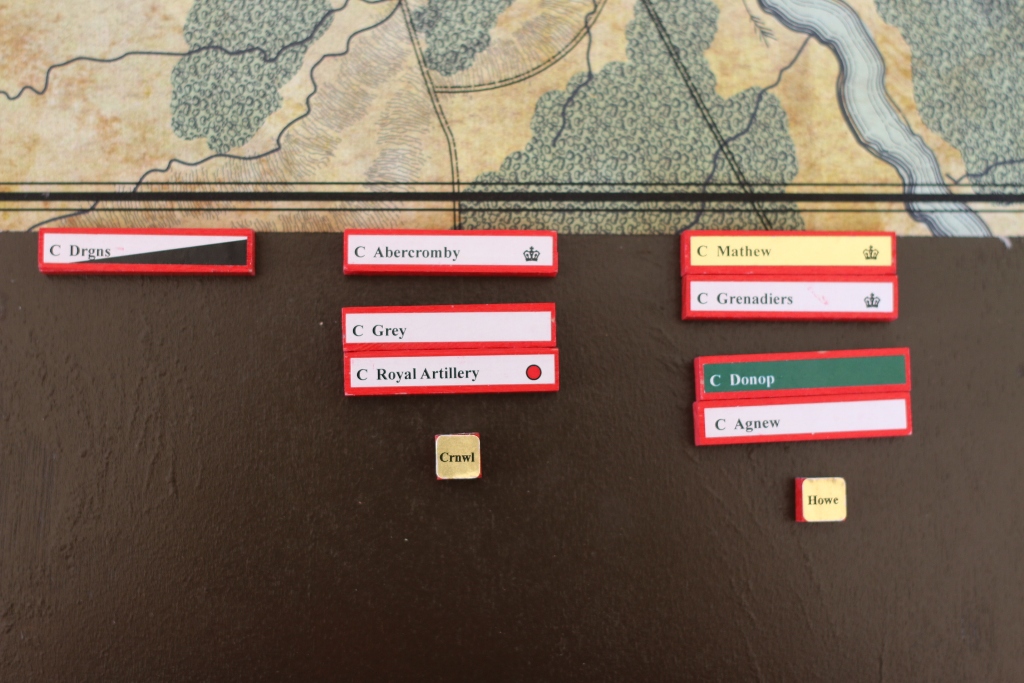
I love using written orders in games. It adds so much depth and fun.  Some players however, hate the idea of using them.  It just ‘seems’ like too much fuss. 

This got us thinking… Is there a simple way to simulate the delays and effects of real Kriegspiel written orders?  Instead of written orders, how about some kind of simple order chit system?

img_7224

We experimented with this extensively. We had hidden and rotating Order cubes along with Directional cubes.  We plotted the movement of messengers and implementation times.  It was a very accurate model of what goes on.  It worked very well. 

img_7225

After all that hard work, we dropped it. What?!  Why?  Because it was unnecessary.  In the end, it added almost nothing to the game.  It added complexity and rules.  It added work for the players to do.  What impact did it have on the outcome and flow of the battle?  Almost nothing. 

Was I disappointed? Absolutely not. I was very excited by this outcome.  Pub Battles is even stronger than I realized.  It already incorporates most of effects of written orders in the basic design.  The way the turns work.  The way the commands move.  The way you can attempt to alter the turn sequence.  This IS Kriegspiel.  These rules are simulating the effects of written orders.  

img_7219

All in a simple, elegant 1 page of rules format. There is a lot more going on with this deceptively simple system than you realize.  I think we’ve stumbled upon a gem.  

In the end, the only thing we’ve decided to add for the Sharpsburg battle is a simple rule for adding Chits to the cup. That’s all we need.  I love it when the best thing turns out to be the most simple thing. 

Bounding Overwatch

7thcav11

A common tactic for Cavalry at the time of Custer, was deploying 1 Battalion to lay down fire while a reserve Battalion formed up and got ready behind. When things started getting hairy, the 1st Battallion would bug out by leap frogging behind the reserve. This would give them time to reform and take over next. In this way, a very small Cavalry force could fight in a sustained conflict with a much larger force.  (assuming they don’t run out of ammo)

Most games don’t simulate this dynamic very well. How does the Pub Battles system model this?


The Cav are small in numbers but they can be very subborn. The Sioux are treated as militia. The Cav are regulars. The result of this in the battle is that the Cav stands and holds relatively easy. The most common result is the Cav stands and the Sioux flips and retreats or is killed. About every 3rd shot flips a Cav.

So, after a couple waves of assaults, most of the Cav battallion ends up flipped. Now they ARE at risk. About every 3rd attack will destroy a Cav Company!

Now, if you had a reserve Bn to the rear, no problem. You hold until the front line becomes mostly spent. Then retreat back behind the reserve Bn. They can rally while the reserve holds the line for a few turns. Then they can switch. This models the common ‘leap frogging’ tactics for Cavalry at the time very well.

The problem at Little Bighorn is: There usually aren’t any reserves. Or the reserves are getting pummeled from another direction. This situation is made even worse by your line getting overwhelmed and flanked on each side. This allows for multiple shots on the Cav which is very likely to flip them in the first wave attack.

Then you end up with an agonizing decision to make. Your line is flipped. What do you do next turn? You can retreat OR rally. You can’t do both. Do you stand and rally so you can fight another turn or two? If you do, you will most likely get enveloped. With some luck, you may be able to fight your way out and fall back. The other option is to retreat but then you stay flipped. Your units remain vulnerable to getting killed in the next combat.  

Custer’s Gatling Guns

gatling-gun

Custer left the Gatling guns behind and for good reason. Bringing them would have greatly slowed the march. In all likelyhood, there wouldn’t have been a battle at Little Bighorn. The Sioux would have escaped.

True but wargaming isn’t just about modeling and duplicating history. One of the most intriguing aspects of our hobby is exploring ‘What ifs?’ It may have not been very feasible but how would Gatling guns have changed the battle? Would it have been enough to save Custer? How and where would they have been best deployed? What impact would they have had? How would the 7th manuvered differently? How would they have changed the their tactics?

Here is a brief report on a recent play test we did with the Gatling guns. It gives you a good idea about how the game works:


I took Custer and Mathey. Mathey set up the G-guns overlooking medicine tail coulee crossing. Custer drove north towards the crossing by Squaw creek.

The Sioux started crossing the Little Bighorn. The G-guns opened up. The first one jammed immediately with no hits. The second one hit 1 Sioux block, sending it retreating and then jammed. :/

The guns would have been immediately overrun and destroyed after that! The only thing that saved them was that Custer rolled to alter the turn. He moved next and turn right around and rode back to cover the guns.

The Sioux attacked. The next turn was a thing of beauty!! The G-guns opened up. They killed about 10 Sioux blocks and sent another 15 running. Custer went back to plan A:   strike across the N. crossing to threaten the NCs.

The next turn, the G-guns popped of a few Sioux then jammed again! Custer tried to come running back to save them but missed the roll this time. The Sioux overran and destroyed them. It was fun while it lasted.

After that, things got rather…… messy.   Custer’s Bn ended up in very awkward positions trying to cover and protect the guns. The whole commanded ended up scattered and isolated somehow.

Sigh.