Captain’s Log -AAR Play Test

This is an After Action Report on the last play test for our Pirate Game. This design is almost done. We have sent it off to the graphics guys for final art work. With a little luck, it might be available later this summer. At the very latest, this fall!

This looks very rough. The cards look terrible but we are we are very happy with the way the game play is turning out. This should give you a good feel for how the game works.


Pre Game

I’m playing a 2 player game against Ty.  My mission?  To safely sail my ship across the table and end the game with the most points.  We lose points for damage to our ship.  We gain points for plundering other ships or sinking pirates.  We get double points for transporting cargo to market, safely across the map.  I’m sailing out of the North.  Ty will be coming out of the South.

The wind is to my back, out of the North.  Fantastic!  That gives me the weather gage.  A huge advantage!  In theory, this puts me in the driver’s seat.  We can engage at will and fight on our terms.  We can evade and avoid contact all together.  Provided I don’t blow it.  –As I’m prone to doing at times.    

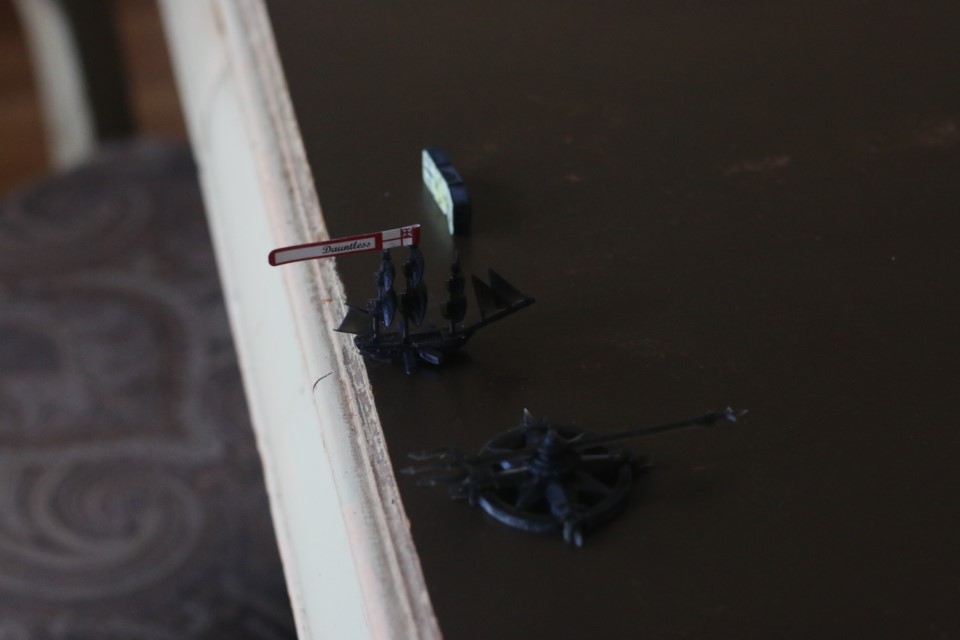
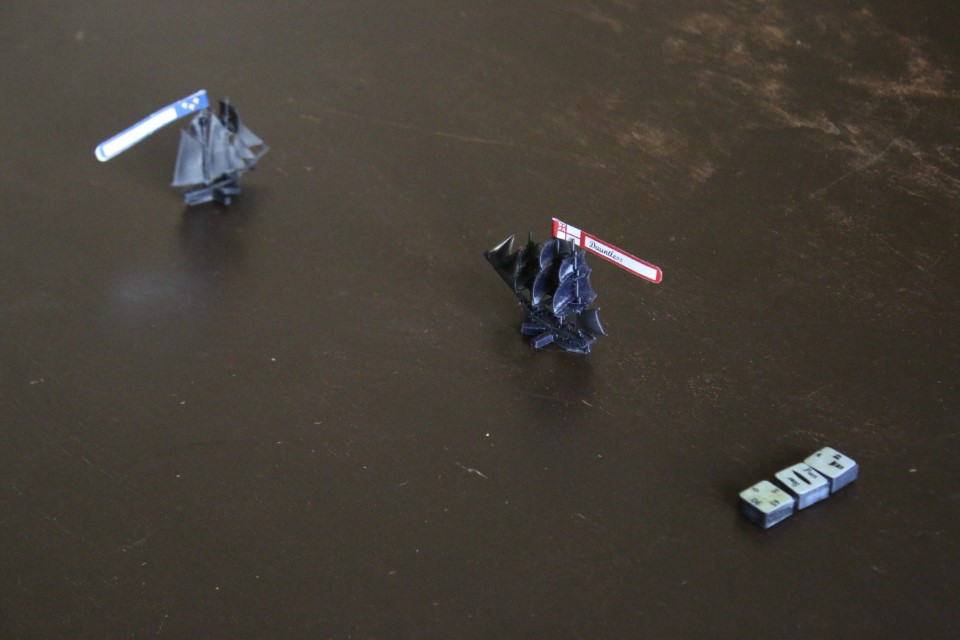
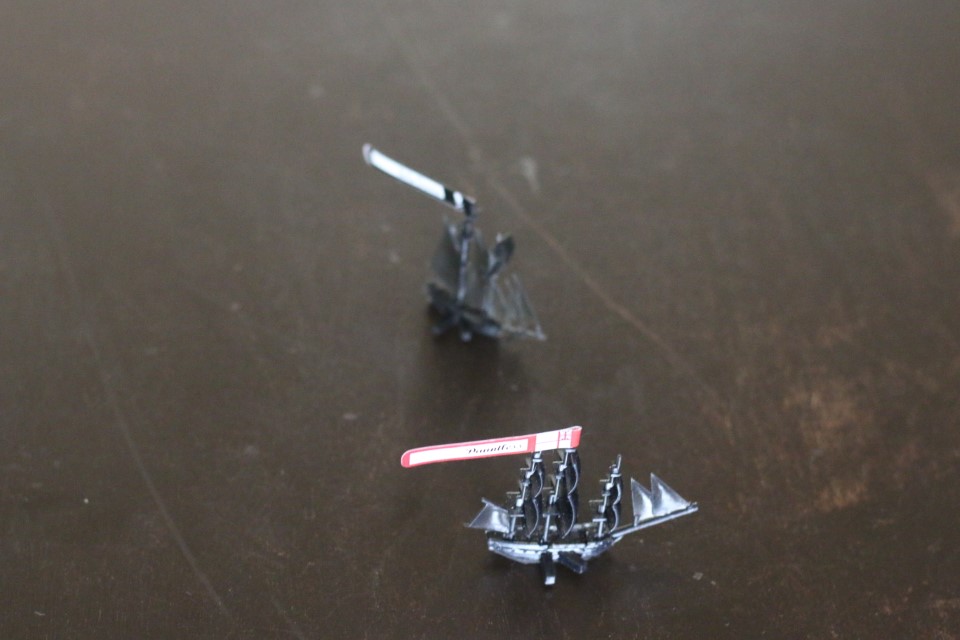
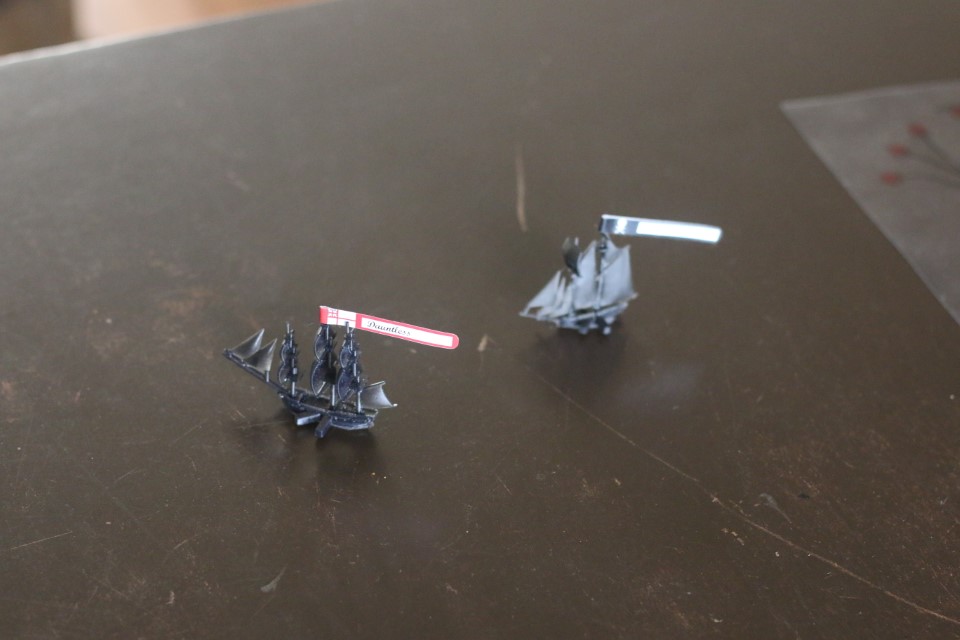
I decide to sail a Sloop.  This square rigged ship will give me a faster speed while running with the wind.  I name her the Dauntless.  My favorite!  Now what to take on board?

Since we have the wind, I want to load up with all cargo.  IF I can craftily slip past Ty and sail off the opposite table edge, that will give me 12 points.  However…  I’d better hedge my bets to be safe.  I’m going to take 1 set of guns and 2 compliments of crew.   That will cut my cargo in half but give me a little bit of resilience if I do blunder into a scrap.  I won’t be defenseless.  This will also give me options if Ty tries to make a cargo run.  In that case, I’ll need to be able to intercept him.  It’s nice to have some flexibility here. 

In this game, the configuration of cargo, guns and crew for the ships is kept secret.  Neither player will know exactly what the other has.        

Ty picks a Schooner.  Good choice.  Schooners are actually faster while reaching into the wind.  That negates much of our wind advantage.  He flies a French flag:  The Magnifique!


Opening move

Ok, we set sail, full speed ahead.  Best to appear confident right?

He sets off on a port tack, heading NE.  That doesn’t mean he is weak or scared of us.  He can’t sail straight for us because that would be directly into the wind for him. 

The main question before us now:  Is he trying to slip past us with a heavy load of cargo, or is he intent on boarding and capturing our ship?  Right now, we have no clue.

His ship is smaller and faster.  If he is loaded up with just cargo and we both just sail across the board unscathed, he will win.  An all cargo load will give him 10 points.  We can only make 6 now because of the guns and crew we carry.  That would be a 4 point loss.  Not too bad, but it’s better for us to win right?

If he is loaded up for a fight, then all we need to do is slip past him.  If we can pull that off, the score will be our 6 to his 0.  That’s the best we can hope for unless we get a chance to capture his ship or something. 


 Turn 2

No change in wind.  Wow, we are closing fast.  I guess this makes sense since we are both moving at maximum speed!  The Magnifique turns about to a starboard tack to the NW.  It is towards us!  Is this an aggressive move?  Not necessarily.  They are running out of table over there and needed to turn about anyways. 

The wind shifts a little.  Coming out of the NE now.  No big deal.  We still have the advantage. 

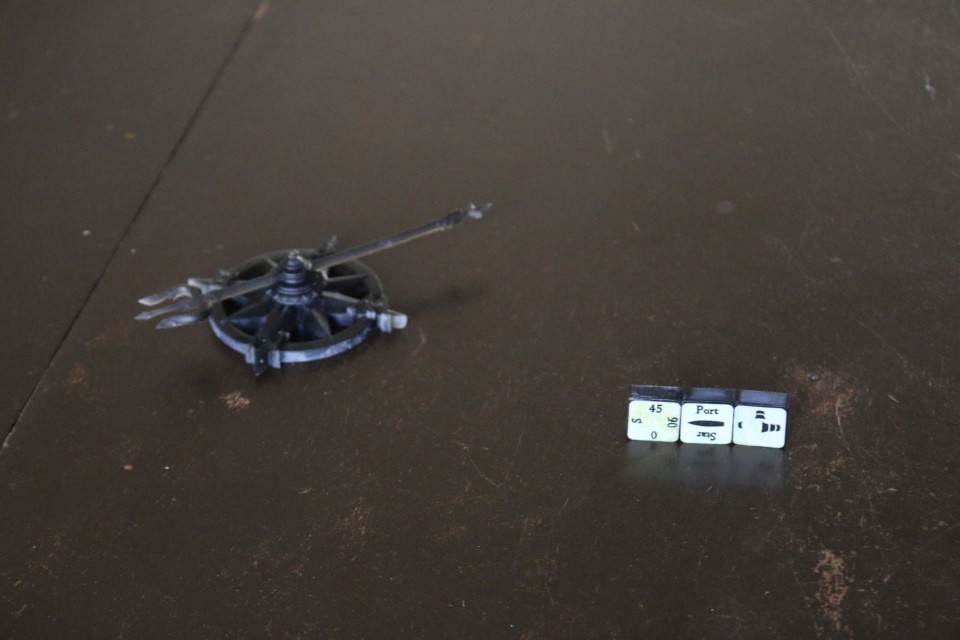
(Movement in this game is simultaneous.  Both players pick their course and speed in secret.  They reveal at the same time and then move.  -Similar to Sails of Glory or X-Wing miniatures.)

We are about to close.  This next move is probably the most important in the game.  Huge decision to make!!!  Depending on how we move, we could easily end up in firing range.  We still have no indication of his intent. 

What should we do?  At this point, I think we are looking to engage.  We may be out gunned.  If that’s the case, we can try to run.  We do need to test the Magnifique and see what she’s made of.  I like our position and heading.  I continue ahead but slow to a crawl.  Let’s see what Ty does. 


Turn 3

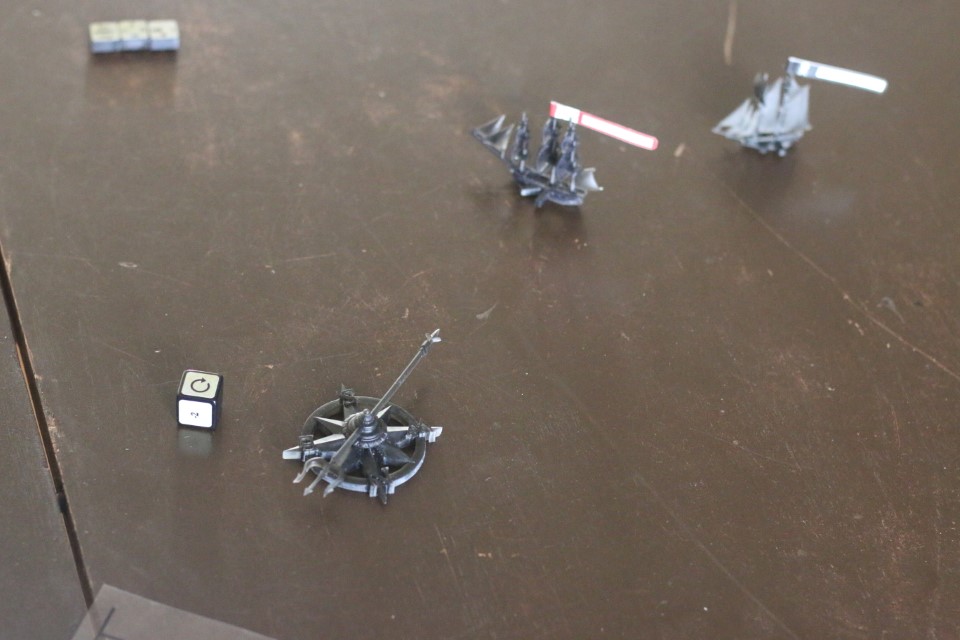
Doggonit!!  That sounded good didn’t it?  Caulk up another boneheaded move for me!  The Magnifique comes about and lines up a perfect raking shot on us.  We can’t even fire back.  Let’s see what she does.  If they have any gumption to fight, she will certainly open up now. 

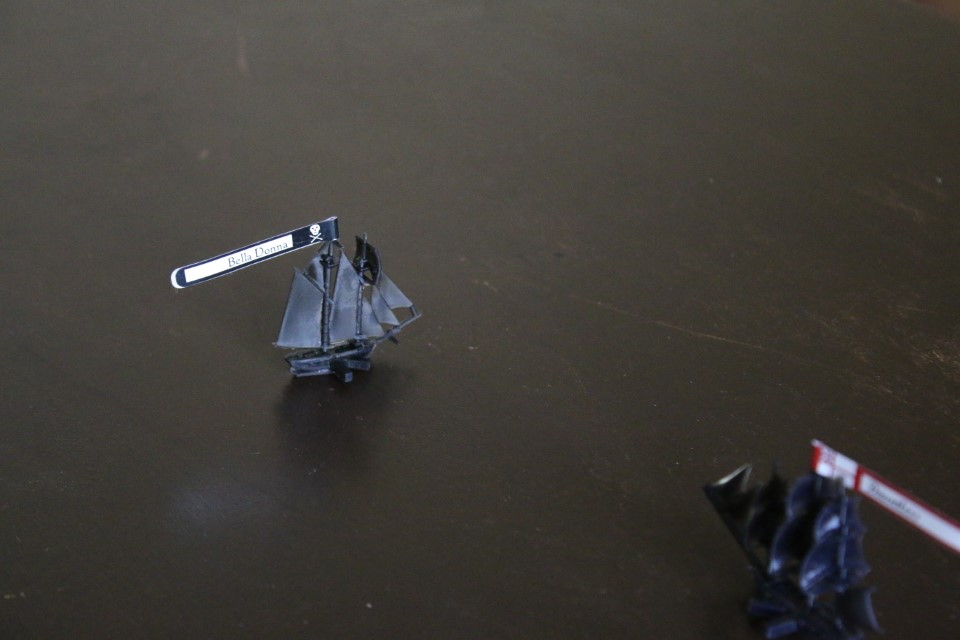
And she does.  She fires 2 sets of guns.  Ok, that clears that up.  Now we know.  She is armed to the teeth and looking to take us down.  Firing on us is an act of Piracy.  Ty switches his flag to the Bella Donna.  Now we get points if we can sink him! 

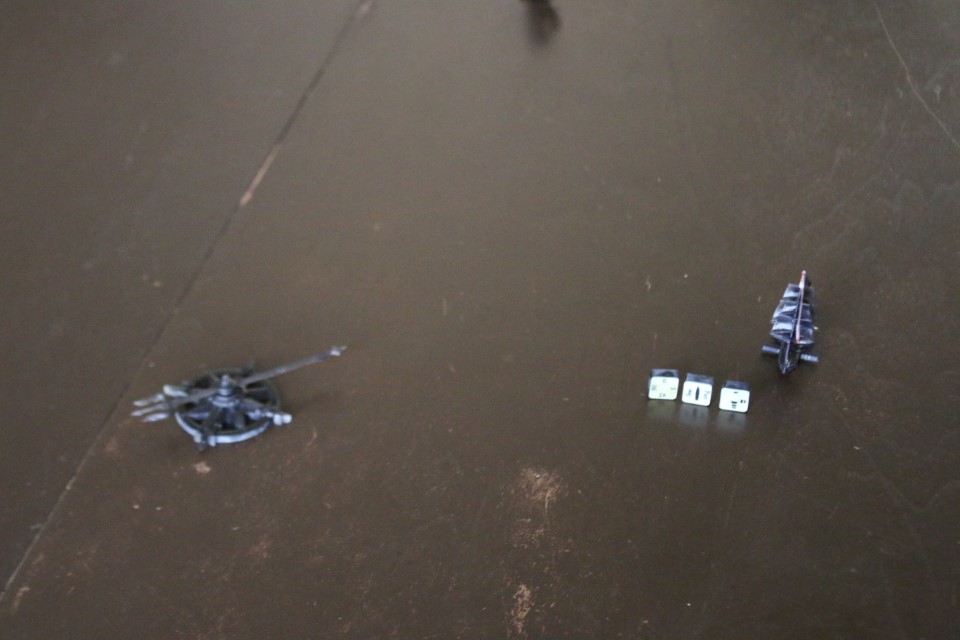
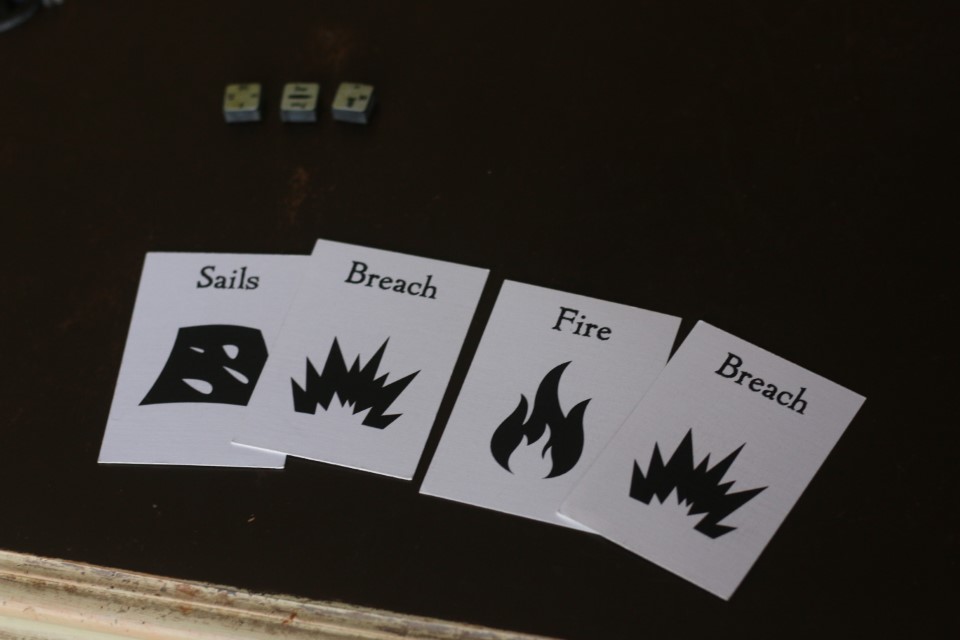
Ok, now let’s let’s get a damage report.  Hopefully this won’t be too bad.  We draw 2 damage cards for a long range shot, 1 extra for the 2nd set of guns and 1 more for being raked. 

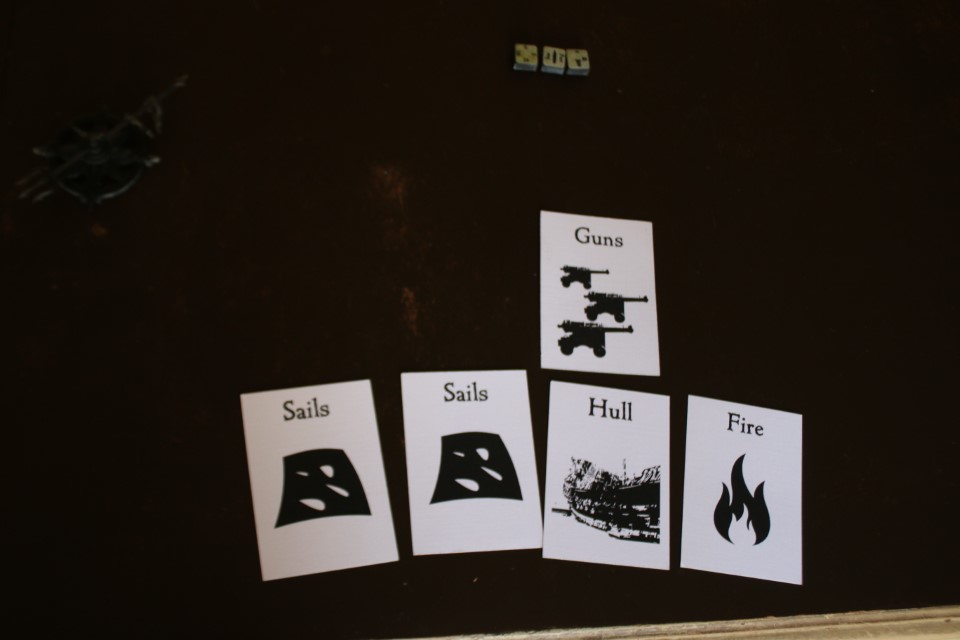
(These are the crude play test graphics.  The graphics wizards should have the final art ready soon.)

Ok, a mix.  A fire.  No big deal.  We can get that put out.  Two sail damage cards.  Not cool.  That will reduce us to minimal speed.  We are going to need to get that fixed.  Finally a hull shot.  That means Ty can randomly pick one of our ship cards to destroy.  What does he pick? 

Our guns!!!  Noooooooooo!  We only had 1.  Now we cannot return fire.  We are a sitting duck.

Now what do we do?!  It’s not over yet.  It’s important to keep a good attitude in this game.  I’ve seen things turn around from situations like this.  We still have a fighting chance.  It is a different game now.  With no guns, we’ll have to run for it.  We still have a strong crew though.  If boarded, we could win.  Maybe the wind will help us!

Noooooooooooooooo!!  The wind slows down!  With our sail damage, that brings us to an all stop.  We are dead in the water. 


Turn 4

Ok, what can we do?  The good news is that we have 2 crew left.  That means they can fix 2 things for damage control.  I put out the fire and repair one of the sails.  If we don’t get clobbered to bad in this next shot, we might be able to slip away for a win! 

The Bella Donna comes around and fires another shot.  It is still long range, just barely.  It is also still a raking shot.  Now one good thing about this, is that right now, Ty doesn’t know that he blew out our only guns.  We haven’t been able to fire at him yet.  For all he knows, we have a full compliment of guns ready to blaze away at him as soon as we get a shot. 

Another interesting puzzle for Ty:  We came to an all stop, why?  Did we do that because we had to or because we wanted to?  He doesn’t know!  All of that is hidden.  He may think that we are incapable of moving now.  Hopefully this will lead to him into making a blunderous move!  Let’s keep our fingers crossed.  Brace for impact.

Ok.  Not too bad.  A new fire, a hull shot and 2 breaches.  The hull shot destroys one of our cargo cards.  Fine.  Right now we need the crew cards!  We can deal with this. 

The wind picks back up again!  Hurray!!


Turn 5

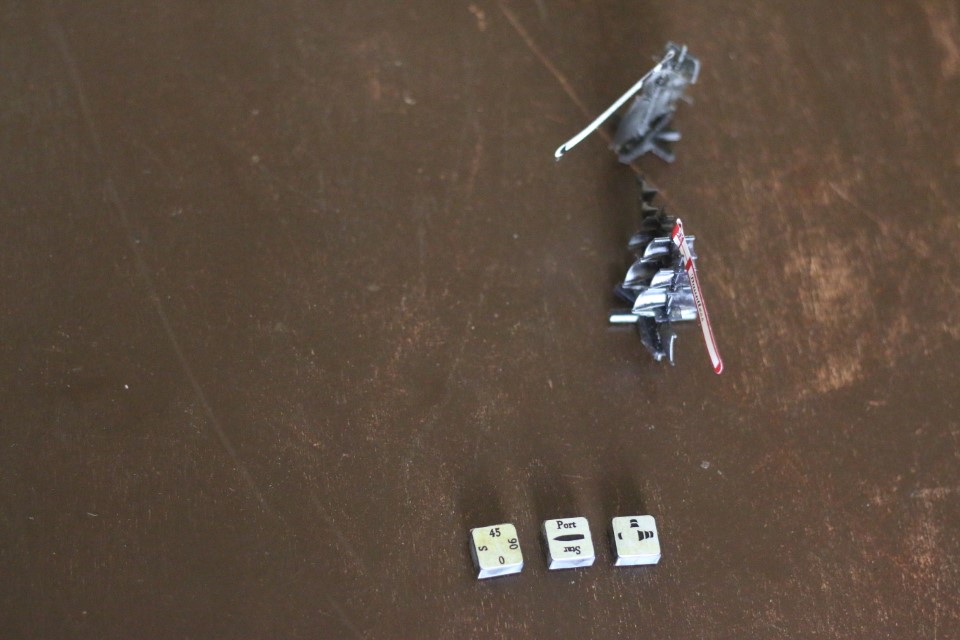
Alright, I bring her about, 45 degrees to port and at best speed which is 2, just 1 notch slower because of the remaining sail damage.  No thoughts of glory now.  All we want to do is run and escape off the South side of the table.  If we can do that we win 4-0.  -We are down 2 points for our destroyed cargo. 

Now just a darned minute.  Belay that order!  I need to think about this.  I already made 1 bad move.  This is another key moment.  I need to think about this from the enemy’s perspective.  What are they going to do?  They can’t turn 90 degrees to starboard because that will put them in irons.  The wind is coming from that direction.  They won’t break off and turn to port because they think they are beating us now.  That means, they will most likely go ahead slow or turn slightly to starboard, right? 

If they do that, and we move 45 degrees to port, we’ll get blasted with another broadside, but this time at short range!!  We got lucky last time.  We want to minimize those shots at us before our luck runs out!

Ok, so how about we instead turn hard to starboard?  That could line up a raking shot on him!!  We can’t fire at him but he doesn’t know that yet.  It is still very valuable for us to line up a raking shot on him because then he can’t fire at us! 

Now the down side to all this is, that we could very well end up in boarding range after this move.  That’s not good but it’s better than the alternative right?  We have 2 crew.  He has at least 2 crew.  He has 1 more card that we haven’t seen.  That is mostly likely another crew.  So we are probably outnumbered for boarding but not by much.

The way I see it, if we’re going to get boarded, better that it happen now right?  We are as close as we are going to get to parity.  If we take another broadside, we might take a crew hit.  We can’t reduce his crew with broadsides.    

So we can try to run away by turning port.  He’ll most likely get 1 more good shot at us.  That could sink us.  It could also kill our crew and slow us down so that he can easily capture our ship for a massive loss:  -6 to 10.  If we are lucky yet again, we’ll slip away for a moderate win:  4 to 0.

If we turn starboard, we will most likely be boarded.  We are not favorites but we could win:  9 to -5.  I like this option.  A better reward for the risk!  New heading:  90 degrees hard about to starboard.  Let out the main sheet!

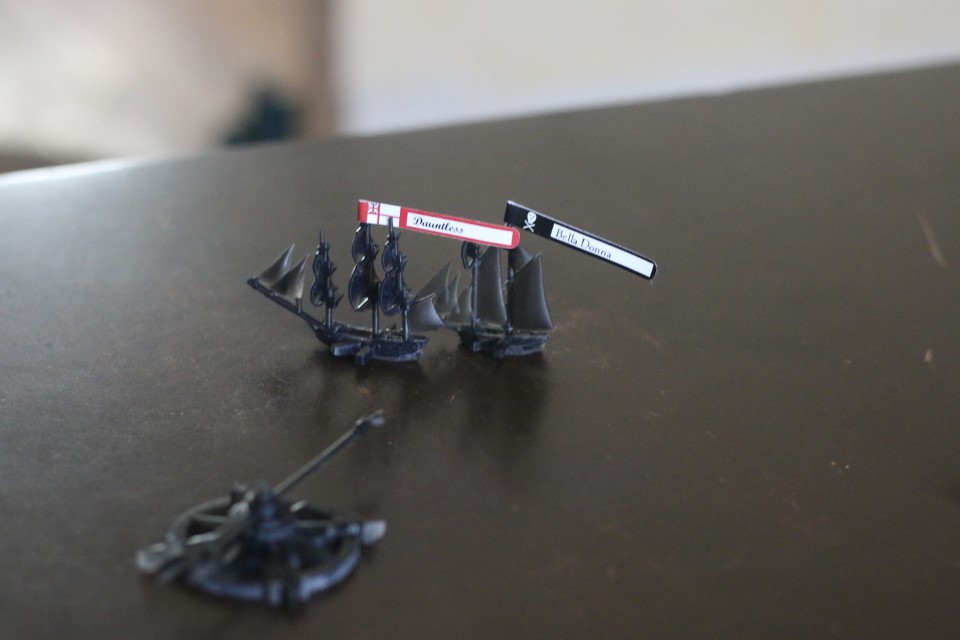
What does the Bella Donna do?  All Stop.  Woo Hoo!!!!

My crafty thinking actually paid off!  We have indeed lined up a raking shot.  The Bella Donna can’t fire at us now!  We can’t fire. Not firing on them raised an eyebrow.  We would have fired if we could.  Ty knows it now.  We know that he knows.  Well, it was fun while it lasted.  Yep the jig is up. 

Time for some damage control!  We have 4 damage cards.  Our 2 crew can repair 2 of them.  Which 2?  If we don’t fix the breaches, we’ll take on water.  If we don’t put out the fire, it will spread.  If we don’t fix the sails, we may not be able to get up the speed to escape! 

Ok, I’m going to put out the fire.  If that spreads, it can get out of control really quick.  I don’t like to mess around with fire.  I have the other crew fix the sails.  We need all the speed we can get now.  It’s time to run.  The breaches will take on water but not enough to sink us.  At least not this turn.    

The wind shifts back to the north. 


Turn 6

Ok now.  Time for another crafty move!  To make points off our cargo, we have to escape off the south edge.  The problem is that if we turn that direction, (port) we are liable to get blasted.

The Bella Donna can’t turn starboard because that’s where the wind is coming from.  What will they do?  Probably come around to port to try to line up another shot on us as we escape.  Think, think.  Ah!  I know:   All Stop!

Yes!!!  The Bella Donna turns hard to port and we line up another raking shot on her!  Ha!  They are so lucky I don’t have guns.  We’d be hauling their sorry carcasses off to be hanged now. 

I patch the 2 breaches in the hull.  We can pump out the water next turn.  No change in wind. 


Turn 7

Ok, now what?  We could just sail dead ahead and run off the map to the right side.  We’d get 0 points then and Ty would get 2 for the damage he did to us.  Hardly seems worth it. 

We can’t turn starboard.  Straight or port will likely get us shot at.  Hmmmm…   Now, what if we come about hard to port?  Maybe we can slip in behind her and then make a run for it!  Let’s try that:  90 degrees, hard to port. 

Whoa!!!   The Bella Donna stopped!  Neither of us have a shot.  I was afraid of this but guess what?  Lady luck winks at us yet again!  We are just a hair’s width out of boarding range.  Thank goodness!!

The wind slows a bit and we do indeed get all the water bailed out. 


Turn 8

We are down 1 in speed because of the wind but so it he.  His ship is faster.  Ours is slower but, his is slower while running (heading down wind).  While heading south like this, he is actually down 2 in speed (1 for the slow wind, 1 for running).  We are as close to even with him as we are going to get.  I think it’s time to make our run for it!  Do we go port or starboard?  Let’s go 45 degrees to port, best possible speed!

Ty reads my mind with the same maneuver.  He fires a broadside.  Brace for impact.

Medium range.  We take 3 damage cards plus 1 for a second gun. 

Well, the bad news is that we have 2 fires and a hull hit.  The good news is that we didn’t take any sail damage and that the hull hit destroyed another cargo.  If it had destroyed a crew, our ship would have burned and sunk!  We wouldn’t have been able to put it out.  We still have a fighting chance!

Oh no!  The wind dies off!!


Turn 9

Well, I guess the upside here to the wind dying off is that it will stop the Bella Donna dead in her tracks.  She is already -1 in speed for running. -2 for wind brings her down to 0 for speed.  We’ll probably take another broadside.  Let’s see if we can start putting some distance between us in the mean time:  Ahead full. 

We put out the fires but they get a raking shot at us. 

Ok, now it’s getting ugly.  Two fires, 2 sail damage, we take on 1 water and we have rudder damage.  That means we can’t make any course changes until we get it fixed.  The wind picks back up again.

Well, not looking good now.  We can still keep her from sinking but if we take one more blast like that, we’re done. 


Turn 10

We limp ahead at minimal speed.  The best we can do.  I’d like to fix those sails but if we do, the fire will rage out of control!  Hmmm….   We could fix 1 sail and put out 1 fire.  That will spread to another fire next turn but we can deal with that later.  That will get us making more forward progress sooner, which will improve our chances of escaping.  We are very lucky we haven’t lost any crew yet.  We still have a chance of winning if they board us.  Let’s see what the Bella Donna does now.

Well, would you look at that?!  Even at minimum speed, we shot ahead pretty quick!  We are on the inside track.  The Bella Donna was slower for running and turning but she’ll pick up speed now that she’s on a beam reach.  Hopefully fixing that sail early will be the edge we need to win this race!  No broadsides this turn.

The wind shifts!!  Out of the NE now.  Not good.  If it shifts 1 more notch to the East, we are in big trouble. 


Turn 11

Ahead full!

Oh no!  The Bella Donna does indeed pick up speed.  She swoops around, into boarding range.  Well, here we go.  At least we have a full crew and a fighting chance, but we are still the under dog.

First, Damage Control. Should I put out the fires?  Hmmm….    If I don’t, and the Bella Donna beats my crew, they will likely not have enough to stop the fire!  My ship will burn and sink.  That means they won’t get any points for capturing my ship.  On the other hand, if I win, my ship will still burn & sink, and I won’t be able to save it.  I have 2 crew now.  Just enough to put out the fire and stop it for good.  If even 1 of my crew dies in the boarding attempt, (very likely) I won’t be able to stop it later.  Well, I guess I’d better go ahead and just put the darned thing out now while I still can.  She has been a good ship. 

Boarding Party

Ty indeed has 3 crew vs my 2.

Round 1:  I kill 1 of his crew!

Round 2:  He kills 1 of my crew! 

Round 2:  He kills my last crew!  Nooooooo!!!

I lost.  He does seize my ship.  The fire is out but there is 1 breach and 2 water.  He can easily fix that with his 2 crew left.  Final score:

Me:  -6 for losing my ship.

Ty:  1 for seizing what is left of my ship, + 2 for taking the cargo on board to market for a profit for a total of 3.  He would have made more if he hadn’t of damaged my ship so badly.  Still a 9 point total victory.  Not bad. 

I fought well.  If I hadn’t lost my gun in that opening shot, this could easily have been a very different fight.  Even so, I gave him a good run for his money.  It’s all kind of my fault for giving him that first raking shot to begin with.    

If there was another player or two, this could have been a totally different situation.  Sure, Ty took my ship but now his crew is spread pretty thin.  He also has a lot damage to repair on the Dauntless before it becomes operational.  Another nearby player could have swooped in and easily stolen his prize.  Maybe even his ship as well! 

Could he fix the Dauntless in time and fight off an attack in his weakened state?  Possibly but it sure wouldn’t be easy. 

Even given all this, I still came close.  I was only 2 moves from escaping off the board for a victory!

What is Kriegsspiel?

Kriegsspiel is a wargame created by von Reisswitz to train military officers in 1812.  It was used by the Prussian military to great success in the Franco Prussian War.  It is considered the first modern wargame.  Kriegsspiel is German for:  wargame.


How do you make decisions with incomplete information?

Critical decisions with high risk and under ignorance?


It is similar to Chess, in that two forces battle against each other strategically to achieve victory.  The pieces are blocks of wood that represent real types of military units:  infantry, cavalry, artillery, etc.  Instead of a playing board with squares, the pieces move across real terrain on real maps. 

The key, unique feature of Kriegsspiel, is that the opponents are not allowed to see the board!  The board is kept in a separate room controlled by umpires.  The players cannot see or move their pieces directly.  To move their pieces, they must write instructions (orders), for the umpire.  The umpire then moves their pieces. If those pieces made contact with opposing pieces. If opposing forces contact, the umpires resolve combat using dice, with tables to account for terrain and other tactical conditions. The umpire then writes reports back to the players on anything their pieces can see and the results of combat.

All of these orders and reports suffer from a time delay.  The umpire calculates how long it would take for these messages to travel back and forth along roads by couriers on horseback. All of these communications are subject to interception.       

Kriegsspiel teaches officers to make critical command / management decisions in an environment full of unknowns.  The strength and location of the enemy forces are mostly unknown.  Often players aren’t even sure where their own forces are!  Players must learn to operate in these unknown conditions, just as they will have to in the real world:  With incomplete information and often in total ignorance. 

Kriegsspiel is like Chess mixed with Poker.  Players learn to develop several contingency plans to deal with the most likely, possible future events.  They most also remain flexible and adaptable to always changing conditions. 

One of the lessons learned from Kriegsspiel is the power of decentralized authority in decision making.  Rather than reports slowly moving up the chain of command to a high ranking General at the top to review and decide;  it is much faster to let lower level officers make decisions based on what they know and see in the field.  This results in a much faster execution of maneuvers in the field, which can exploit enemy weakness, while it still exists.

Kriegsspiel style planning can accelerate the tempo of conflict, often beyond the pace of what the enemy can respond to.  This was used to great effect in the Franco Prussian War and later culminated in the theory of Blitzkrieg or Lightening War; used by the Germans in WW2, General Patton and later General Schwarzkopf for the invasion of Iraq.


Random Order of Battle

Though not a full on Solitaire system, this is a fun way to play and gets pretty close.  Mike Strand came up with this idea.  It works on any Pub Battles game.

Basically, you don’t know if the Corps are actually there for the battle.  Set up the game normally, except you only place the HQs on the map.  You don’t know if that Command is actually there or not.  Move them around as if they were until they are spotted by the enemy. 

Then, simply roll a die to see if they are actually at the battle or not.  1-3, they are not present.  Remove the HQ and chit from play.  4-6, they are present for the battle.  Place their forces on the field at or behind the HQ. 

You can play one side, and then randomly roll as you sight the enemy side to see if they are really there.  It works for both offense or defense.  You can even roll for your forces too!  I would recommend rolling for each of your Corps first before the battle so that you actually know what you are working with.  I’d wait to roll for the enemy Corps until you can sight them. 

Won’t this radically throw the play balance out of whack?  No.  It still works fine.  That’s because victory isn’t tied to the map, it’s tied to your baggage trains!  End up badly outnumbered?  So what?  You can still easily win.  Make the best of what you have to work with.  Belt out significant losses on the enemy, then bug out.  It is still possible to leave with a substantial point victory. 

Test this out and let us know how it goes!

Kriegsspiel Example 3

What do I do now?

I’ve been fighting at Brandywine with the Rebel army. I made a stand further forward. Stirling’s brigade defended forward on the Osborne’s hill to the left. I held the woods with Nash’s reserve brigade and the Pennsylvania militia. Both my brigades were thrown back in Total Defeat. Stirling fought a controlled withdrawal back to Birmingham Hill here on my left.

By the time the British advanced and formed up for a new attack, I was able to reorganize my troops and bolster their strength with a battalion of Sullivan’s Marylanders and some 6 pound artillery.

In the center, the British regulars have been watching and threatening to attack but they must have chickened out. They are just sitting there.

On the left, Stirling was attacked by the British Grenadiers and Guards several times. He was lucky and able to drive them back. The British were brave and fell back in good order but took horrendous casualties in devastating musket fire laid down by Stirling. Reminds me of the slaughter at Bunker Hill! Yes, those are the best troops the British have on our left but they’ve been defanged now.

The Hessians and Abercromby’s Light infantry attacked Sullivan’s battalion holding our right twice. We were very lucky and repulsed them both times.

Fine except that Abercromby’s Light shifted to our right. Our far right was screened by our dragoons but Abercromby struck them with the support of the Hessian Jaeger dragoons. That sent my dragoons reeling back.

Now the trouble is my exposed baggage trains: that dark line of blocks on the road. :/

Any way I can salvage this situation? I’ve been doing just fine till now but this looks really bad.

I could launch my dragoons forward in a suicide attack. Maybe they’ll give the baggage train the time they need to escape.

I could attack Abercromby’s Light with Sullivan’s battalion. (2 right blocks) That might distract them enough to save the dragoons but then my artillery will be exposed! Seeing that, the Hessians will attack and wipe them out. So, I’ll have to pack up the guns and send them to the rear.

Ok but then that still leaves my center line of Nash and the militia with an exposed right flank and no artillery support. Those patient British regulars will probably attack my center with artillery support while the Hessians hit my right flank. Just in time for me to get the terrible luck I am about due for. :/ Even with good luck, I probably won’t win that fight.

If I do all of that, I can most likely get out my baggage and artillery, while the rest of my army takes a beating and then routs from the field.

Is that worth it? What’s the alternative? Any other ideas out there? My main MSR runs down that road to the right by the dragoons. I can’t retreat to the left off map. The enemy is attacking from that direction also.

It looks so peaceful and secure right now but all hell’s about to break loose. I hate it when that happens.

Kriegsspiel Silence

You command this small colonial brigade at Brandywine. You hold the center of the field for your side. Your orders are to defend this ford and prevent the enemy from crossing it. An enemy Hessian brigade attempted to cross and launched an assault up the hill. You won! A Total Defeat for the enemy, with heavy losses.

You considered following up your victory to drive across the river and finish the Hessians off. The enemy baggage train is likely behind them, however a fresh British brigade moved up from reserve and bolstered the Hessian line. Given that, you called off the attack and have held your line.

Since then? Nothing. The enemy has not made another attempt to cross the river. As the hours wore on, you’ve heard sporadic fighting back and forth to your left and to your right (about the 4 o’clock position). There were 2 friendly brigades to your right and rear, but they marched off towards the sound of combat to your right. For you, just turn after turn of sitting here.

The sound of combat to your right is growing in intensity and is moving closer to you…

What should you do? Continue to follow orders and hold this position? The enemy isn’t attacking anyways. If the enemy breaks through to your right rear, you could be surrounded and cut off! Your commanding officer is probably in the middle of heavy fighting to your right. He probably doesn’t have time to write you. Did he forget about you? If he gets shattered and has to make a run for it, will he have time to inform you first? Has that already happened? The enemy could be maneuvering around to encircle you right now! How long do you sit here and wait?

If you wait too long, your troops will have been wasted in the battle. Maybe if you marched to the sound of the guns, you could arrive at a critical moment to turn the tide and help your side win the battle!

On the other hand, that march would be disobeying direct orders in the middle of a critical battle. What if your side is doing fine over there? What if the Hessians cross the ford while you march over there without orders? Losing that key position in the center of the line, in the middle of a battle could cause your side to lose this battle!

Will you be the hero that saved the day? The fool that disobeyed orders and lost the battle? The fool that sat there doing nothing while his side was defeated, and was then captured & taken prisoner? Spend the rest of the war in prison, if you aren’t hung as a traitor by the British.

You might think that getting stuck with this command in a game would be boring. What did you do during the game? Well, the enemy attacked us once. We drove them back. Then I just sat there for the whole game doing nothing.

In Kriegsspiel, just sitting there “doing nothing” can be agonizing. How long do you sit there? What is going on around you? Has it come time to move under your own initiative or should you stay the course? What justifies disobeying orders? Can you defend your actions in a courts martial?

How about now? How about now? The clock is ticking and the situation is changing from turn to turn. More time has past and been lost. More time with no orders or updates. More fighting heard. The fighting is growing in intensity and moving from 4 o’clock to 5 o’clock and approaching 6 o’clock now. Is that enough? How much do you need? How long do you wait? It’s not boring. It is excruciating!!!! Agonizing!!!!!

Terrific fun! The kind of fun you don’t see in wargames but it is the exactly the kinds of things you see in real life.

This is the Umpire’s map during the game that you couldn’t see.

Kriegsspiel Example: 2

Kriegsspeil is a game of Decisions.  This is a great example of the types of things you run into from a real game.  These are the types of things you don’t see in regular wargames but you see them all the time Kriegsspiel, as well as in real life!


Situation:

You are J Grant.  The officer in charge of the last Brigade in this column.  Your orders this morning from the Army commander were to march north to the objective (marked by the flag to the right) in an attempt to flank the enemy before a pending battle.  The baggage train is following on behind you.

When you reach the junction at Nice Town, you notice that Grant’s Brigade is marching north!  NOT to the objective, not on the route described in your orders.  You notice that the rest of the column does indeed appear to be marching in the way you were ordered. 

What do you do?

I see a few basic options here.  First, you could just follow Grant’s Brigade.  The problem with this is that you don’t have orders to go that direction.

Second, you could just ignore Grant, turn right and continue on to the objective as ordered but why is he doing this?  Has the mission changed? 

What else could you do? 

Kriegsspiel Example: 1

Kriegsspeil is a game of Decisions.  This is a great example of the types of things you run into from a real game.  These are the types of things you don’t see in regular wargames but you see them all the time Kriegsspiel, as well as in real life!


Situation:  The enemy is somewhere on the lower / southern half of the map.  They trace supply off the southern edge of the map along the main road that runs down the center. 

Your side is on the offensive.  The main effort will be to march down this main road, entering from the north to attack the enemy.  Your side’s overall goal is to defeat the enemy army and drive them south and off the map.

Your command is small wing.  It is made up of militia brigade and couple of light detachments.  You’ve been marching south, down this road on the east side of the map since 7:00am.   As you arrived at this crossing, a heavy fog settled into the area.

These are your orders:  General, you will take your Pennsylvanians and two detachments down Rowan Hill Road and continue to where the Wissahickon empties into the Schuylkill river, and cross the Wissahickon there, to the mill, follow back up the East side of the Wissahickon and attack the British from the rear while we occupy their front. Use the detachments to expand your frontage when entering battle.

Decision: You continue to march north east along the Wissahickon as ordered. The fog has gotten very bad now.  Visibility is down to only 10 paces.  You have arrived at this point on the map.  Suddenly, you hear the sounds of combat.  It seems to be coming from the area circled on the map.  There is a large volley of cannon fire in this area that seems to be firing north.  After that a moderate exchange of musket fire.

What do you do now?

You’ve been ordered to attack the enemy’s rear.  Where is that? South of the combat just heard?  Arguably but you’ve also been ordered to “follow back up the east side of the river”.

With the dense fog, can you even successfully navigate further south to find the enemy’s rear before it’s too late?  Sounds like the battle is already starting.  If you continue north east along this road as ordered, you could reunite with your main army and commander.  However, with the dense fog, will your approach be mistaken as the enemy!  Will you cause a friendly fire incident? 

Maybe they won’t fire on you but will divert troops away from the attack at the critical moment to investigate your approach.  That could easily cause the attack to fail. 

Should you sit and wait?  Waste time at a critical moment while you send a messenger ahead to get confirmation from your commander?   What if the enemy army is ahead along this road?  What if your messenger gets captured and then the enemy is tipped off that you are there on their flank?

This is quite the conundrum.  Whatever you do, you better do it quick.  This battle is happening in real time.  You have about 2 minutes to make your decision!

THIS is Kriegsspiel.  

Reading Contour Lines

There is some confusion out there on what the slope lines mean and how to read them.  Here are a few examples to clear things up. 

It may look a little messy at first but I actually like these old style slope lines much better than modern day contour lines.  It is easier for me to visualize up and down. 

In this example, Red is up on top the hill.  They can see down to Blue at the lowest elevation, sitting behind the stream.  Effect:  Red will have cover here if attacked by Blue.   

Red has dropped back here behind the ridge now.  They are on the Reverse Slope.  There is no line of sight between these units.  Effect:  Red will have cover if attacked by Blue.   

In this example, Blue is at the highest elevation.  They are up on top of the hill.  Red is still on the hill but further down the slope.  White is down at the base elevation at the lowest point.  Effect:  Blue will have cover here if attacked by Red.  Red will have cover if attacked by White.

Here, Red and Blue are both on the hill.  The issue is that they are both on the same slope.  There is no cover here for either side.  I would treat combat between these two units, the same as if they were on clear terrain. 

Kriegsspiel Puzzle

This is a fun little puzzle to sort out.  It reminds me of Kriegsspiel.

Both sides play Kriegsspiel blind via an umpire.  It is a lot like poker in some ways.  What does the enemy know?  What do they not know?  What do we know about the enemy?  What does their known action reveal about their motive and intent? 

These are all the types of questions you constantly puzzle over while playing Kriegsspiel.  It is exactly the type of thinking you need to solve this problem:


There is a secret prize hidden under one of these five objects.  The teacher privately tells the girl what the correct shape is.  The teacher privately tells the boy what the correct color is.

Next the teacher brings them both together.  The first one to pick the correct object gets the prize.    

Teacher:  Do either of you know where the prize is?

(silence)

Teacher:  Do you know now?

(silence)

Teacher:  Do you know now?

Boy and Girl:  Yes!

Where is the prize?